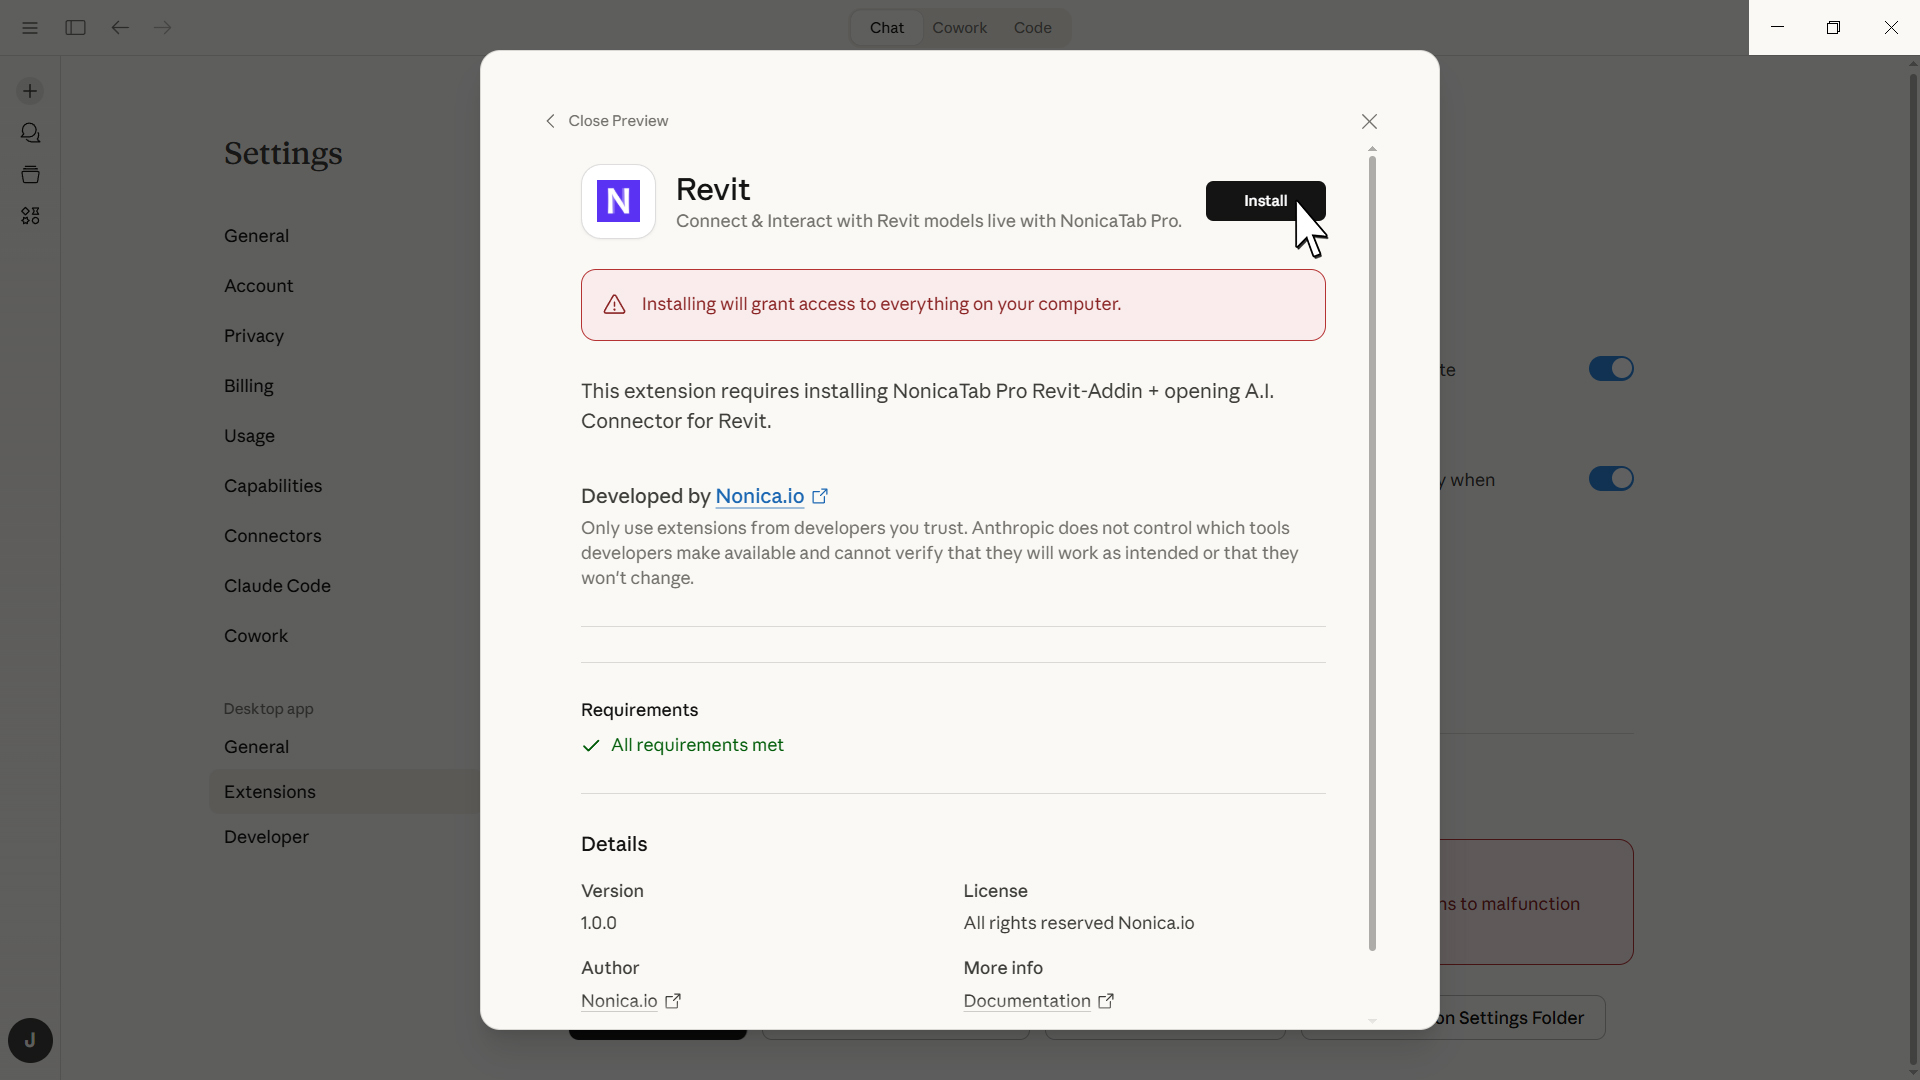
🔌 A.I. Connector
Connect Revit models with A.I. Desktop Apps (MCP), providing A.I. with +50 specialized tools for Revit analysis, edit existing elements and parameters, and create documentation in Revit.
Version 1.4. | Features depend on the versions of NonicaTab | The Best of the Best
Overview
Traditional A.I. chats for Revit create and run code from scratch, leading to errors and limitations when handling complex tasks. This connector is different. It provides A.I. with +50 pre-built and tested tools specifically designed for exploration, analysis, editing existing elements and parameters and documenting Revit models.
The A.I. Connector uses Model Context Protocol (MCP) to establish a secure bridge between your Revit environment and compatible A.I. desktop applications, enabling QA/QC model analysis without the typical coding errors.
Key Features
Usage is not limited to:
- Comprehensive Reports: A.I. generates detailed reports analyzing elements, types, parameters, and project statistics.
- Performance Analysis: A.I. examines model warnings, identifies performance bottlenecks, and suggests optimization solutions.
- Accessibility Compliance: A.I. evaluates rooms and spaces for wheelchair accessibility and ADA compliance.
- Schedule Integration: A.I. extracts schedule data and creates visual graphs, charts, and analytical dashboards.
- Quality Control: A.I. performs model audits and edit elements and parameters/properties.
- Custom Edition: A.I. analyzes specific queries about your model, and edit elements and parameters values if requested.
- Create Room Elevations and Add To Sheets: A.I. creates elevations, views and sheets, and arranges viewports in sheets.
Sample live reports:
Requirements
Before running the A.I. Connector, ensure your environment meets the following prerequisites:
 Autodesk Revit: From version 2022 to newest.
 A.I. Desktop App: Claude Desktop App, Copilot, Cursor or any other MCP compatible platform.
 NonicaTab Pro: Read + Analyze + Edit + Document existing elements in Revit models (+50 tools).
 or NonicaTab Free: Read + Analyze Revit models (37 tools).
*If you don´t have Revit 2025, 2026 or 2027 installed, you will also need .Net Runtime 8.0
Video
The A.I. Connector is compatible from Revit 2022 to the latest release.
More info about Multi-Agents in the Multi Agent Mode section.
Usage
Initial Setup
- Launch Revit: Start Revit 2022 or later and open your target project.
- Access Connector: Navigate to NonicaTab → A.I. Connector.
- First-Time Setup (if tool not visible):
- Step 1: Click dropdown menu and select "Set Up Button/Script"
- Step 2: Select the A.I. Connector tool to add it to your interface
- Step 3: Tool becomes available for use after setup completion
Establishing Connection
- Launch A.I. Desktop App: Launch your compatible A.I. application (Claude Desktop, Copilot, Cursor, ...).
- Start Connector: Click A.I. Connector in NonicaTab to open the connection window.
- Maintain Connection: Keep the A.I. Connector window open and connection enabled throughout your session.
Working with A.I.
- Ask Questions: In your A.I. app, ask specific questions about your Revit model:
- "Generate a report of all doors in the project"
- "Analyze model warnings and suggest solutions"
- "Check accessibility compliance for all rooms"
- Monitor Progress: A.I. will use available tools to analyze your model and provide comprehensive responses.
- Review Results: A.I. generates reports, charts, and recommendations based on your model data.
Advanced Workflows
- Model Auditing: Request comprehensive model health checks and optimization recommendations.
- Compliance Checking: Analyze accessibility, code compliance, and design standards adherence.
- Data Visualization: Convert schedule data into interactive charts and dashboards.
- Custom Analysis: Ask specific technical questions about elements, parameters, or project metrics.
- Edit Parameters: Ask A.I. to review and fix parameter values for you. It will find common patterns and fix formatting issues or wrong values.
- Room elevations: A.I. can generate room elevations and add them to a new sheet per room.
Multi Agent Mode
In the video, we use VS Code, but Multi Agent Mode can also be run using Claude Desktop App.
Before using Multi Agent Mode, we recommend starting with the simple connection setup first. Multi Agent Mode is a more advanced feature that:
- Requires more technical configuration.
- Consumes higher token usage (increased costs).
- Intended for experienced users with complex workflows.
Installation guides below.
What is it?
The Multi Agent Mode lets you run multiple A.I. assistants at the same time, each working on different Revit tasks independently.
Instead of having one A.I. assistant that you ask questions one at a time, Multi Agent Mode is like having multiple A.I. assistants working in parallel. Each one can be doing something different in Revit without interfering with each other.
For instance:
AI #1 might be generating a report on all the doors in the project
AI #2 could simultaneously be analyzing model warnings
AI #3 might be checking accessibility compliance in rooms
All three are working at the same time on different tasks, rather than waiting for each to finish before starting the next one.
- Do not use with Editing tools. For instance, if an agent modifies elements that are being analyzed by another agent, the results will be misleading. We recommend you to disable all Editing tools for this mode from the A.I. Connector.
- Do not use with high processing tools or linked documents. There are tools in the A.I. Connector that Revit can take longer to process. While processing, other agents won´t be able to access the Revit model. Below, there is a list of the tools that should be avoided:
| Tool Name | Description |
|---|---|
| get_size_in_mb_of_families | Returns the file size in MB for loadable Revit families. |
| get_boundary_lines | Extracts boundary geometry (lines/edges) of Walls, Floors, or Rooms with precise XYZ coordinates. |
| get_document_switched | Switches between the main Revit document and linked documents. |
| get_viewports_and_schedules_on_sheets | Retrieves viewports, schedules, ... placed on sheets. |
| Editing and Creation tools | Includes tools to move, rotate, copy, delete elements, and create new elements like views, sheets, grids, levels, and tags. |
Installation Guide for Claude Desktop
This is the easiest and fastest way to run Multi Agent Mode, although it is less stable than running in VS Code (guide next section) :
Autodesk Revit: From version 2022 to newest.
NonicaTab (recommended Pro v4.7.0.24 or newer, as includes token efficiency TOON and auto-setup).
Claude Desktop App.
Claude Pro or Max plan.
*If you don´t have Revit 2025 or any newer Revit version installed, you will also need .Net Runtime 8.0
1.Install Claude Desktop App
Go to the official site here and download the latest version of Claude Desktop App.
Run the installer, use the default options during the installation and log in with your Claude Pro or Max account.
On the top left corner, click on the symbol </> and select install runtime dependencies.
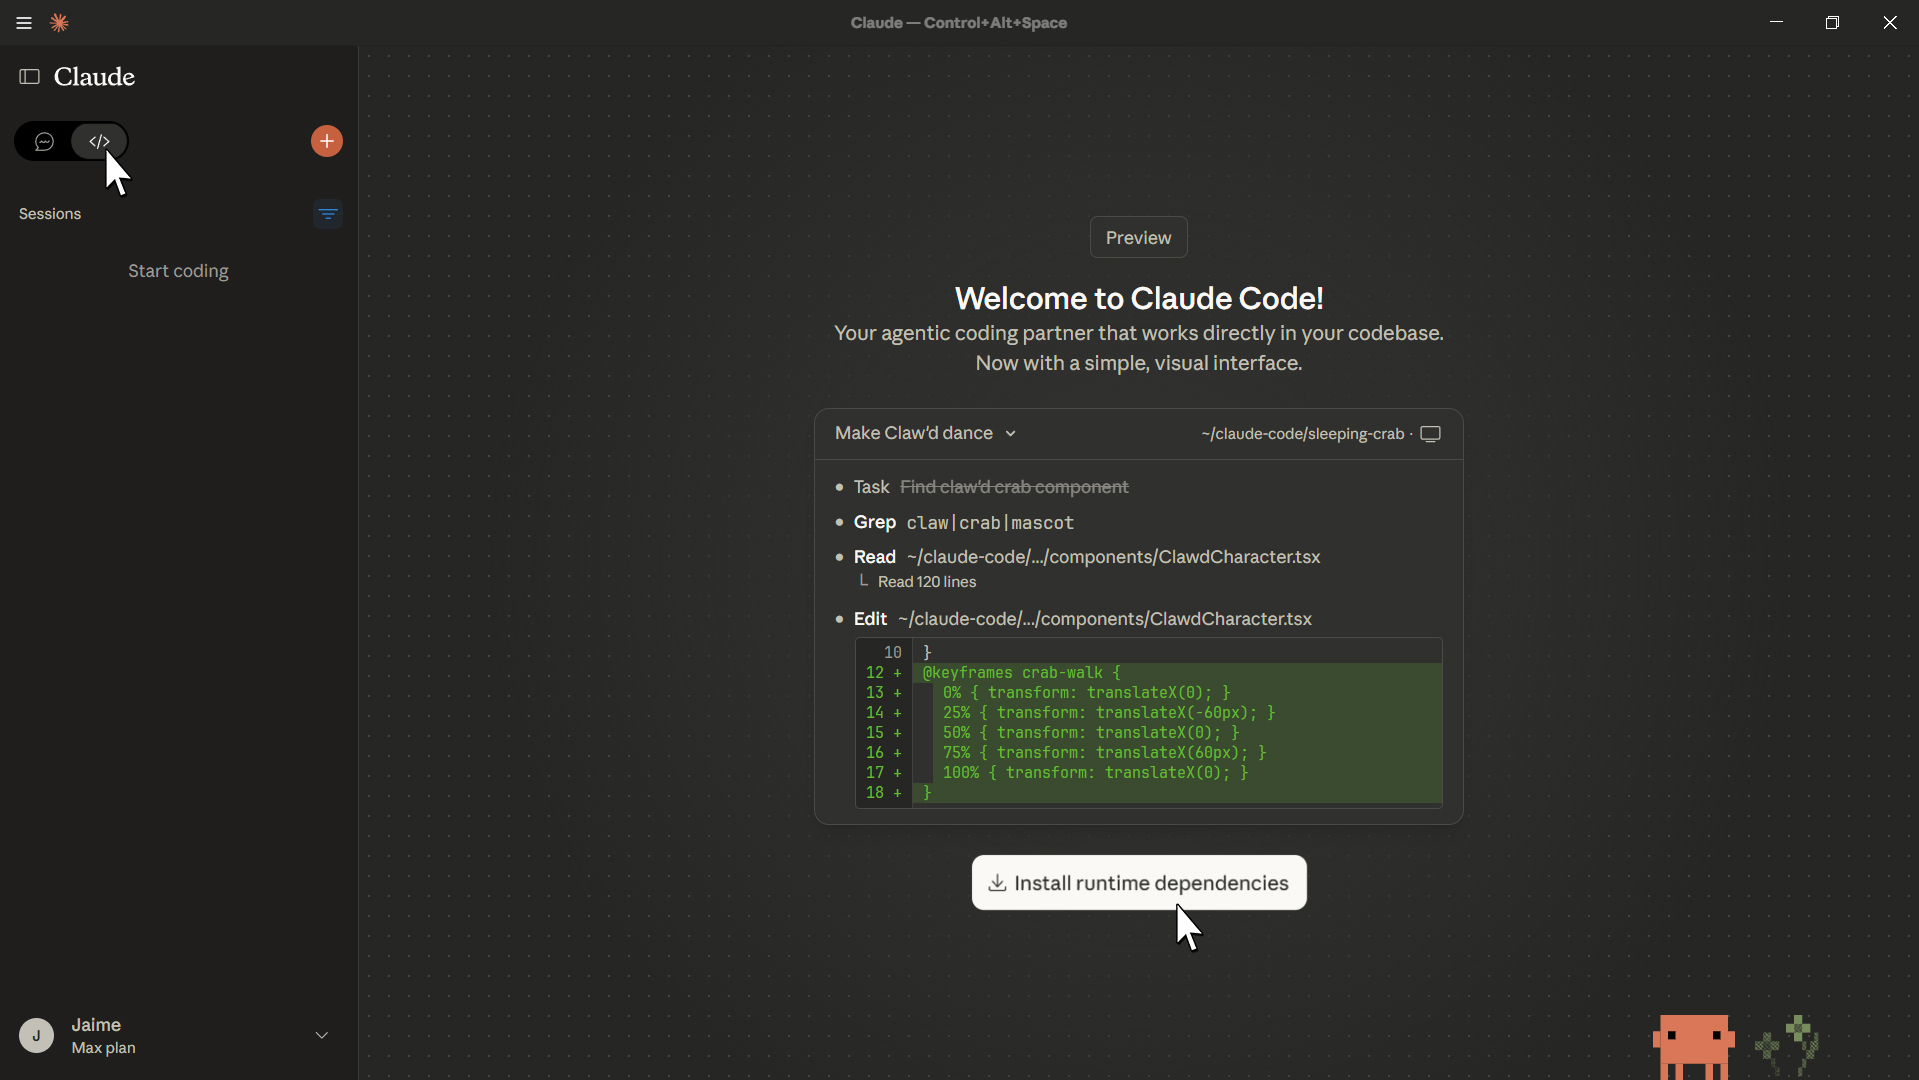
*If you don´t see the option on the top left corner, you are likely running an older version of Claude Desktop App or don´t have a Claude Pro or Max account.
2.Connection
Open Revit and run the A.I. Connector in NonicaTab Pro latest version (auto setup).
Close Claude Desktop App from system tray (bottom right corner near Windows clock) and open again.
3.Final Step
Create an empty folder in your desired location in your PC.
After setup, keep in mind that A.I. will be able to read and work with any files or subfolders within it.
Select that folder in Claude Desktop App and select Local worktree option.

If you want to auto-allow the execution of tools and not being asked for confirmation every time a Revit tool is being run:
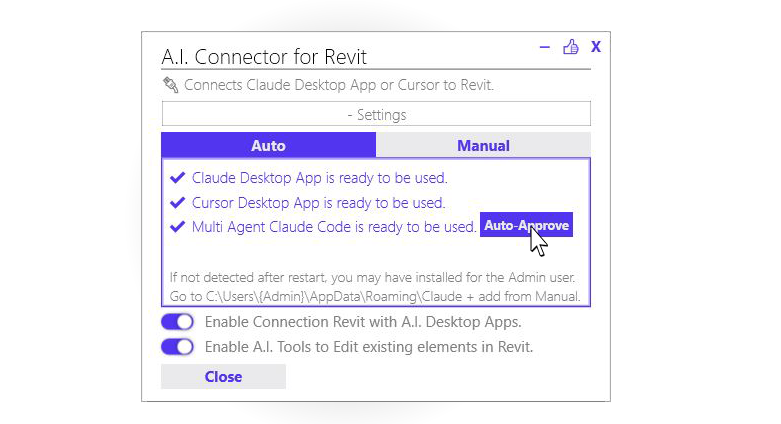
- Click on + Settings in the A.I. Connector.
- Once the connection with Multi Agent Mode is successful, you will see a button called Auto-Approve.*
- Click on Auto-Approve and select the folder created at the beginning of Step 3.
*If you don´t see that line, you are running an older version of NonicaTab Pro. You can update it here (only install the new version on top).
Sample Multi Agent Prompt
Run 2 agents in parallel, so each agent does one of the following Revit tasks:
1. Analyze all wall types in Revit and identify the values of the fire rating type parameter that have formatting issues such as missing units, inconsistent abbreviations, or non-standard time formats.
2. Find the floorplan views in the model made to show a specific rooms, get the scope boxes cropping those views and check if any of the views have a scope box not properly assigned.
Provide a final summary with the results of the agents.
Installation Guide for VS Code
This requires the following:
Autodesk Revit: From version 2022 to newest.
NonicaTab (recommended Pro v4.7.0.24 or newer, as includes token efficiency TOON and auto-setup).
Git for Windows.
Visual Studio Code.
Claude Code Extension for VS Code.
Claude Pro or Max plan.
*If you don´t have Revit 2025 or any newer Revit version installed, you will also need .Net Runtime 8.0
1.Install Git for Windows
Go to the official site here and download the latest version of Git for Windows.

Run the installer and use the default options during the installation.
2.Install Visual Studio Code
Go to the official site here and download the latest version of Visual Studio Code for Windows.

Run the installer and use the default options during the installation.
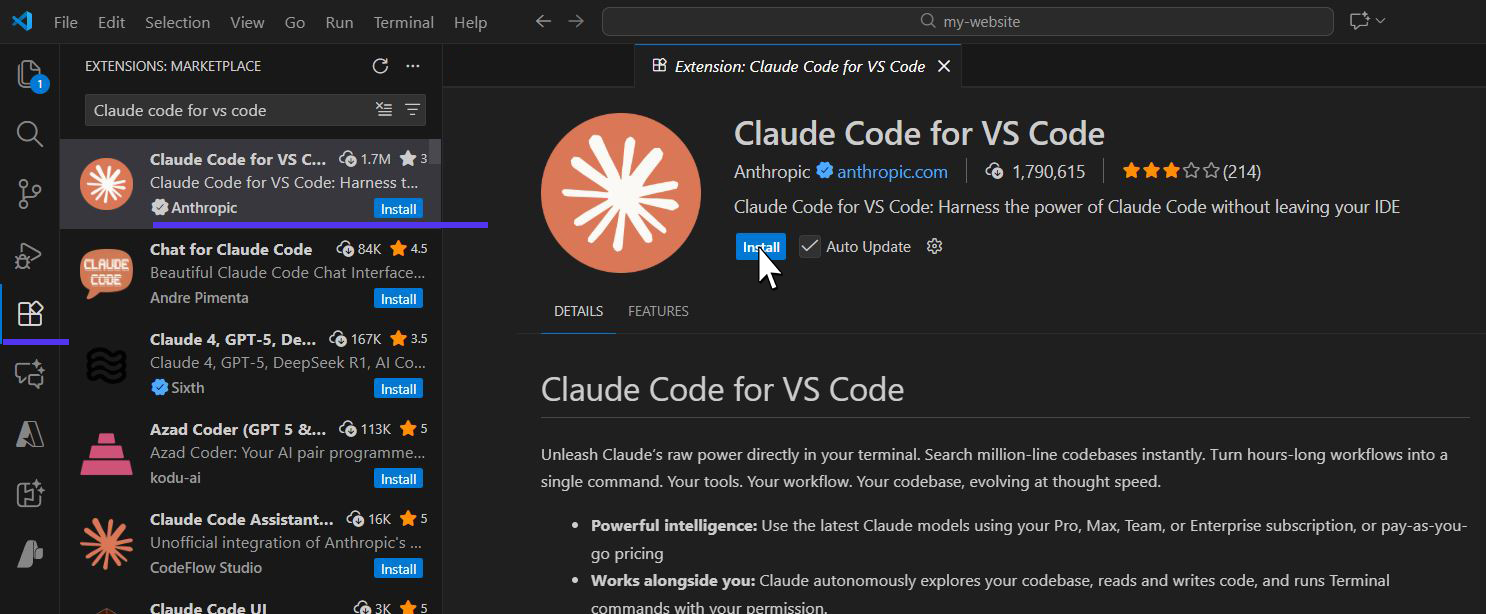
3.Install Claude Code Extension for VS Code
Go to the official extension here and click on Install Claude Code for VS Code.
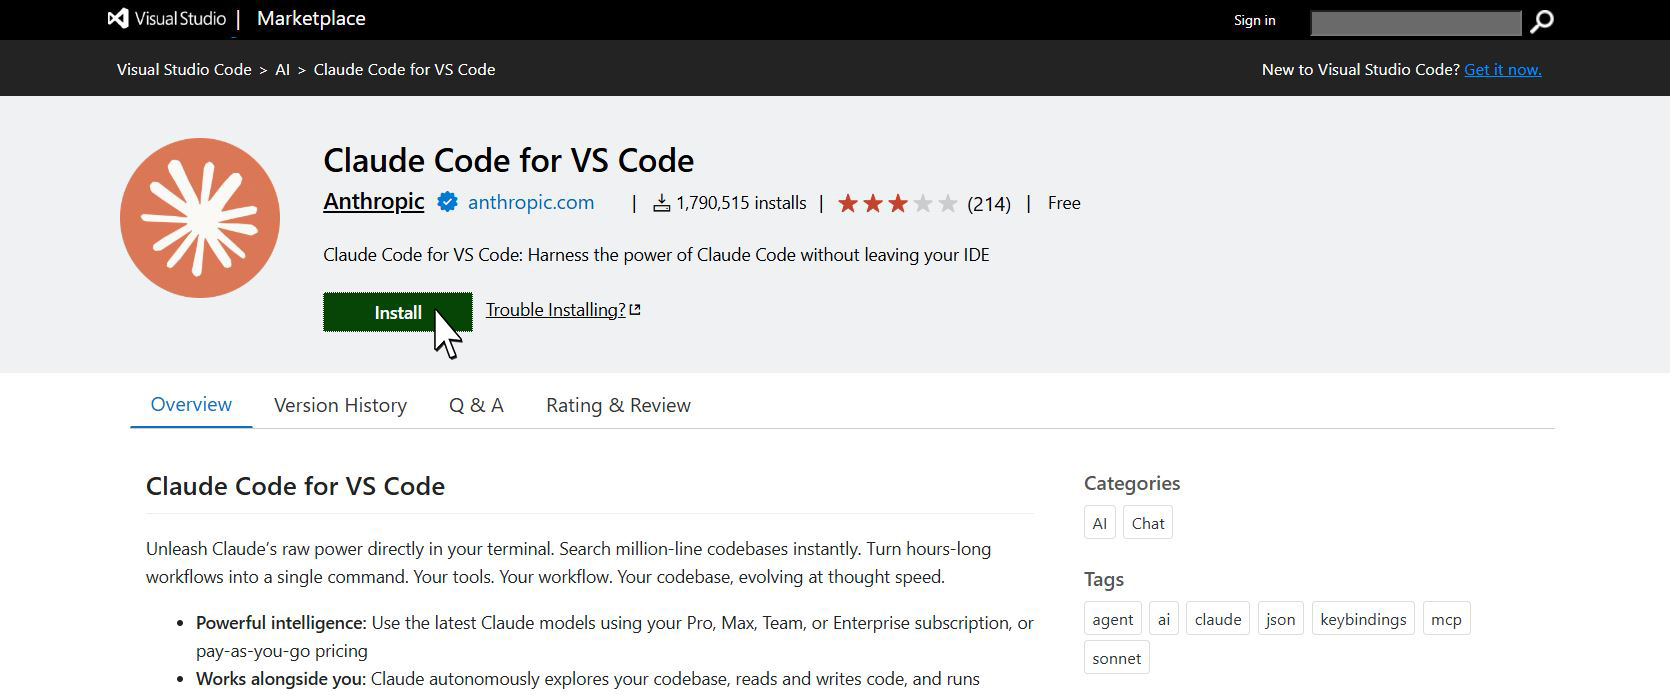
Your browser will ask if you allow to open Visual Studio Code.
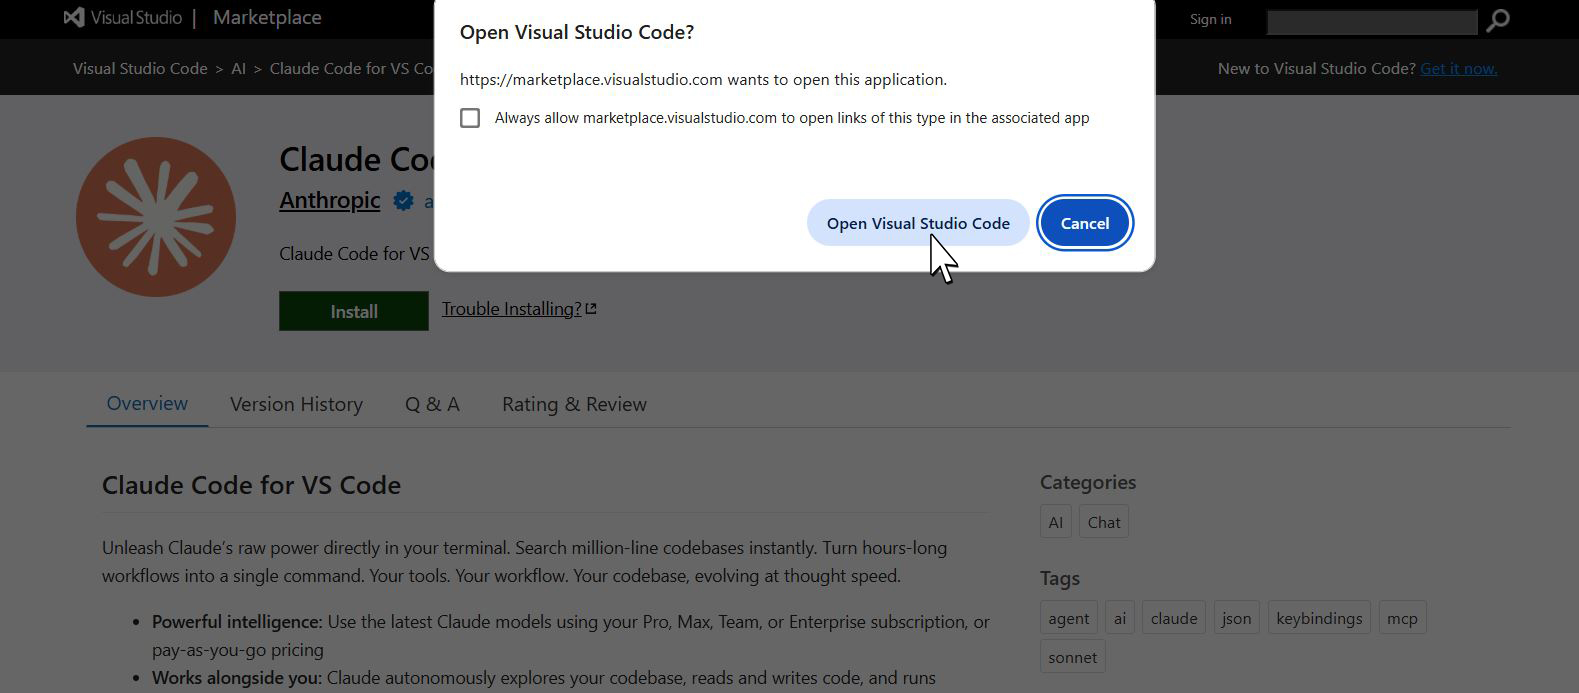
Click on Open Visual Studio Code and install Claude Code for VS Code.
If your browser did not raise the notification, you will need to open Visual Studio Code.
Go to Extensions by clicking on the icon with 4 cubes in the left bar, and look for Claude Code for VS Code.
Then, click on Install.
4.Set up Visual Studio Code
Create an empty folder in your desired location in your PC.
After setup, keep in mind that A.I. will be able to read and work with any files or subfolders within it.
Run Visual Studio Code, click on File (top left) and Open Folder. Select the folder you previously created.
In Visual Studio Code, click on File and New Text File. A window will pop up.
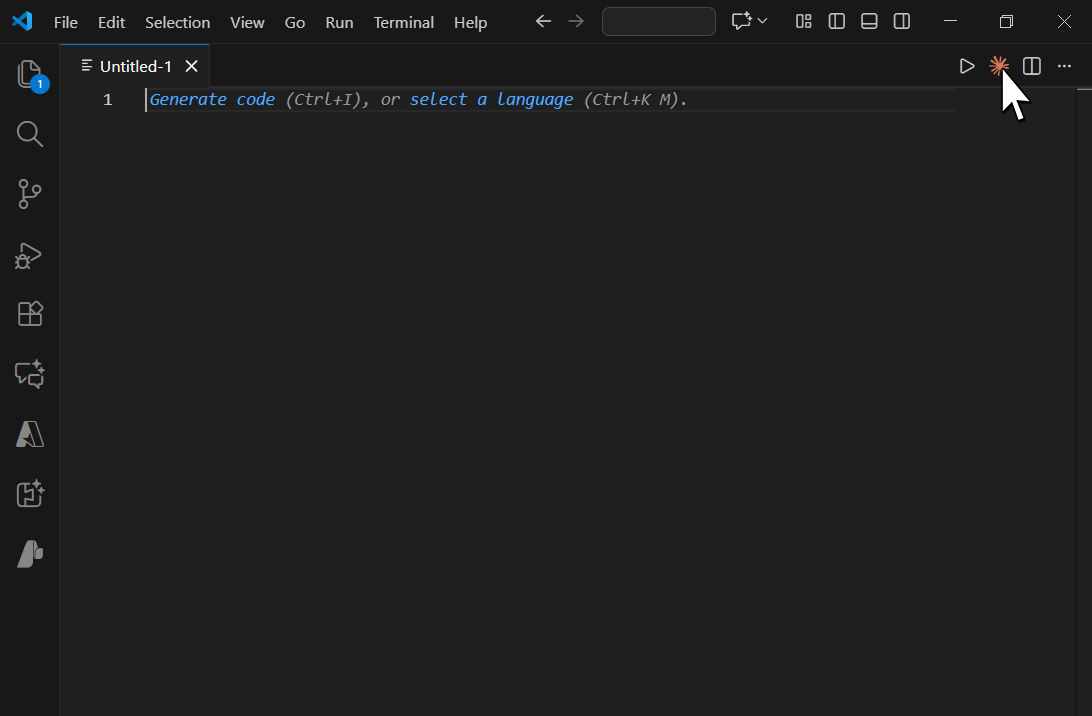
Click on Claude icon (orange) in the top right, and log in using your Claude credentials.
Remember you need Claude Pro or Max plan to use this feature.
Once set up, close Visual Studio Code.
5.Final Step
Open Revit and run the A.I. Connector in NonicaTab Pro (auto setup).
You can now open Visual Studio Code and Claude Extension as in Step 4, and start asking Claude.
Troubleshooting
Connect with Copilot in VSCode (or other A.I. Desktop Apps)
The A.I. Connector automatically connects and sets up Claude Desktop App and Cursor. For Visual Studio Code with Copilot, the connection can be enabled by:
-
Enable Connection: Enable MCP connection in VSCode and create a mcp.json file. How-to Enable MCP in VSCode
-
Add Connection: Copy + Paste the code below into your mcp.json file from previous step.
{
  "mcpServers": {
    "Revit": {
        "type": "stdio",
        "command": "C:\\NONICAPRO\\OtherFiles\\System\\Core\\net8.0-windows\\RevitMCPConnection.exe",
        "args": [],
        "timeout": 15000
    }
  }
}
- Restart Apps: Restart VSCode and open the A.I. Connector in Revit to activate the connection.
Connection Issues
- Claude Desktop App Can't Find Tools:
- Run A.I. Connector in Revit.The window of the A.I. Connector must be kept opened to allow the connection.
- Restart Claude Desktop App completely.
- Close Claude from system tray (bottom right corner near Windows clock).
- Re-Launch Claude Desktop App.
- If You Still Find Issues Connecting to Revit:
-
A) Download our Extension file (.mcpb):
⬇ Download for NonicaTab Pro ⬇ Download for NonicaTab Free -
B) In Claude Desktop App, click on your user icon (bottom left) and go to Settings.
-
C) In the left menu, click on Extensions.
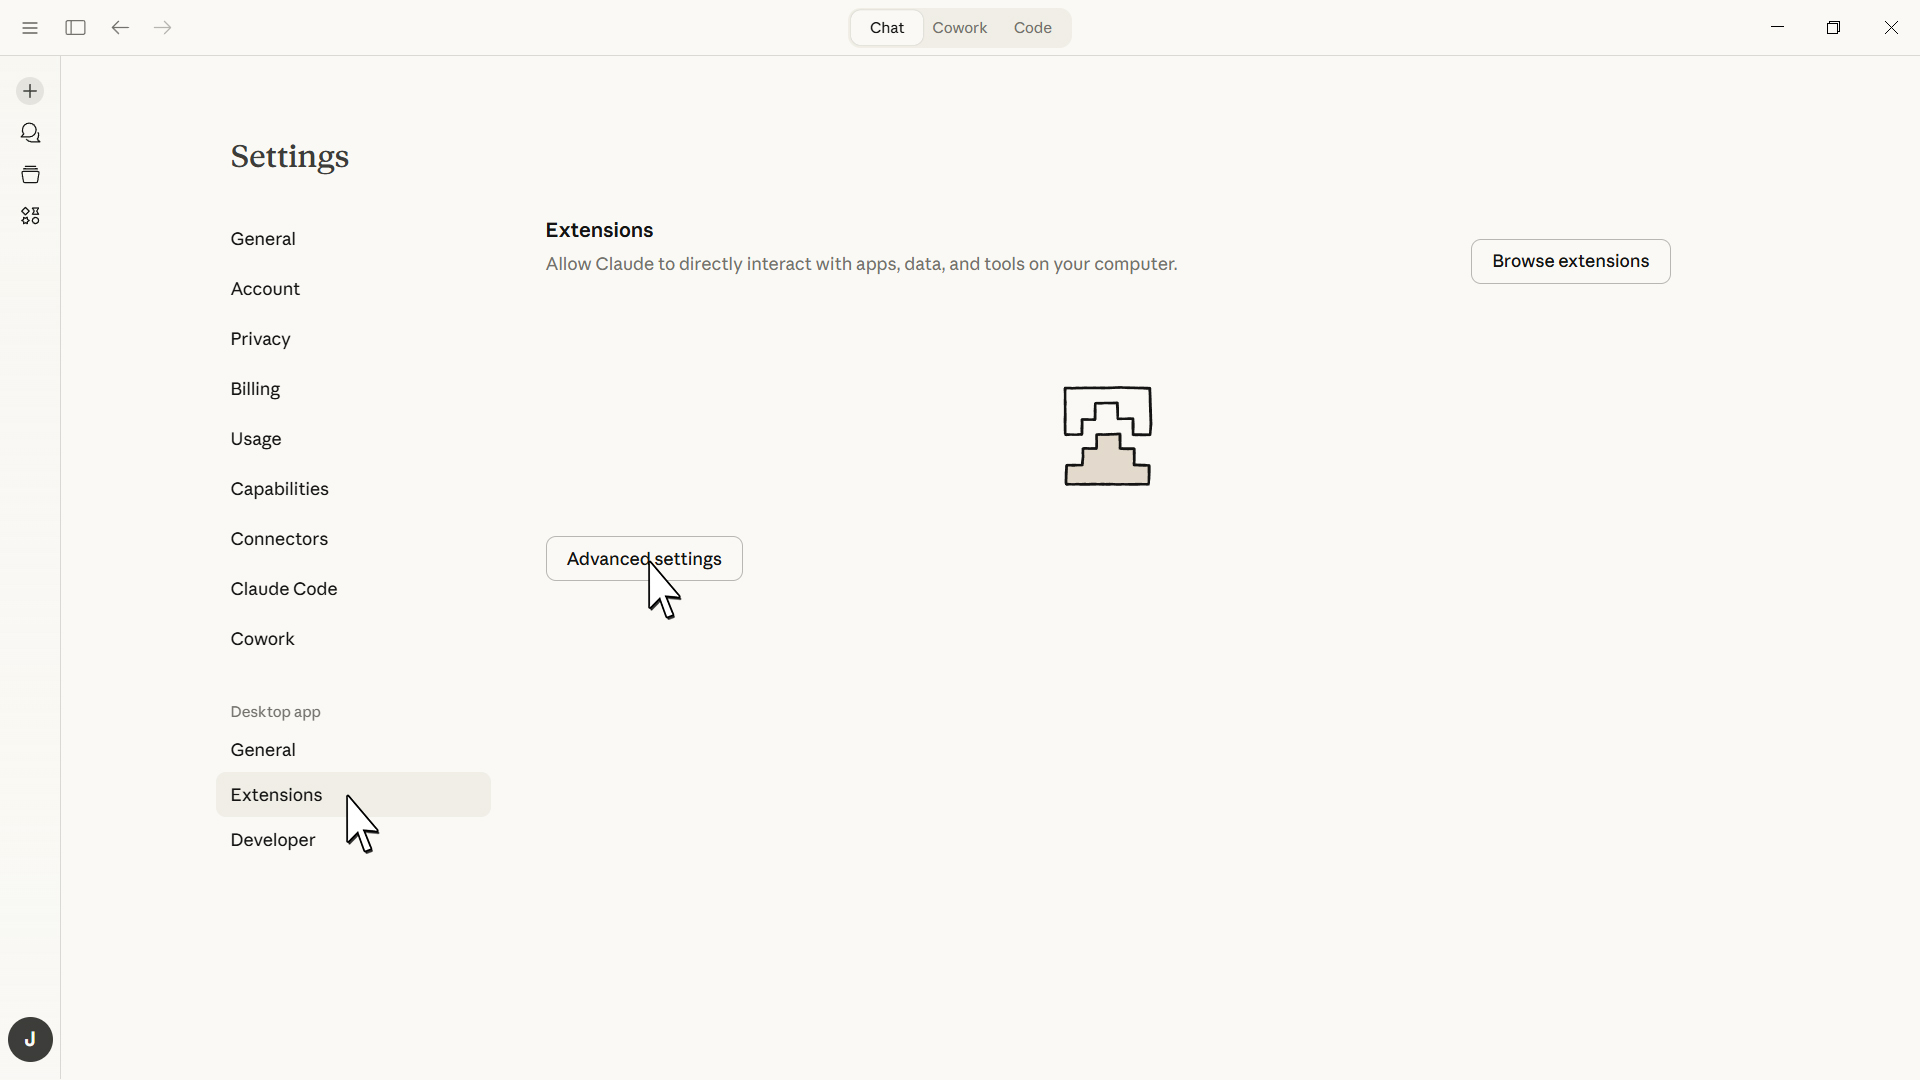
- Go to Advanced Settings and, at the bottom, click on Install Extension.
- Select the Extension file (mcpb) according to your version of Nonicatab and click on Install.
- Run the A.I. Connector for Revit. It must be kept opened to allow the connection. It may still show the message; No A.I. Desktop App detected -> Install One, but the connection should be active and you can start asking Claude.
-
Extensions are disabled on this device. Please contact your IT administrator to enable extensions.
If that message is shown in Extensions, your PC was detected as part of an organization and Claude Extensions were disabled by default.
- If you have Admin rights in your PC, you can enable Extensions by adding the Registry Keys below.
- Go to Windows icon (bottom left), and look for PowerShell, right-click in Windows PowerShell and Run as Administrator. Copy + Paste the code below and press Enter.
$rp = 'HKLM:\SOFTWARE\Policies\Claude'
New-Item -Path $rp -Force | Out-Null
Set-ItemProperty -Path $rp -Name 'isDesktopExtensionEnabled' -Value 1 -Type DWord -Force
Set-ItemProperty -Path $rp -Name 'isLocalDevMcpEnabled' -Value 1 -Type DWord -Force- Restart Claude Desktop App (from the system tray next to Windows clock) and go back to Step A).
- If you are part of an organization, don´t have Admin rights and Claude was installed by your IT team, send this guide to your IT team and they will be able to add the Registry Keys when installing from MSIx.
❌ Error: MCP Revit: Server disconnected.
❌ Error: MCP Revit: write EPIPE or ENOPIPE error message.
If you find this message when running Claude Desktop App, you are likely running an old version of NonicaTab. Please, update to the latest version of NonicaTab + restart Revit and Claude Desktop App (from system tray).
FAQ
Do I need Revit 2022 or newer?
Yes, the A.I. Connector requires Revit 2022 or newer. However, all other NonicaTab tools remain compatible with Revit 2020 and later versions.
What is MCP and why is it important?
Model Context Protocol (MCP) is a standardized communication method that allows A.I. applications to securely access and interact with external tools. This ensures reliable, error-free communication between A.I. and Revit.
A.I. connection "failed", what do I do?
This issue may be related to:
- If you don´t have Revit 2025, 2026 or 2027 installed and you are trying to use the A.I. Connector in a older version, you need to install .Net Runtime 8.0 to run it, and restart Claude Desktop App after.
- If you Copy+Paste the path to mcp.json, but you left C:\NONICAPRO in the path while using the free version, or left C:\NONICA while using the pro version. Correct the path to point at the right folder.
A.I. can't find tools, what do I do?
If you run the A.I. Connector after your A.I. Desktop App was already open, restart the A.I. app completely. For Claude, remember to also close from the system tray. If issues persist, check "Installing from Non-Admin Windows User" below.
Claude freezes or shows a blank screen after first connection. What do I do?
This can happen after the first time you connect Nonica with Claude. Corrupted cache files may prevent Claude from loading correctly. To fix it:
- Fully close Claude Desktop App (including from the system tray, bottom right corner near the Windows clock).
- Open File Explorer and navigate to %APPDATA%\Claude (paste this into the address bar and press Enter).
- Open the Cache folder and delete all files inside it. Do the same for the Code Cache folder.
- Reopen Claude Desktop App normally.
Claude found tools, but can´t use them. What do I do?
If you can see the Revit tools in Claude and the connector is enabled, but still Claude can´t really use the tools. It is likely that your connection with Revit is being blocked. First, try to run Revit as an Admin, and Claude as an Admin (right click and Run as Administrator). If that still did not fix it, maybe a security system or antivirus is blocking the connection. Try it with Cursor App, it has a free plan for initial testing and, depending on the system, it is more often allowed to connect with Revit.
Installing from Non-Admin Windows User
If you installed Claude (or any other) using Admin permissions, but the Windows user is not currently Admin. Then, A.I. Connector cannot automatically set up everything for you (restriction with permissions). Go to C:\Users{ Admin }\AppData\Roaming\Claude, and Copy + Paste the code from A.I. Connector // + Settings // Manual to claude_desktop_config.json. After that, restart your A.I. Desktop App.
IT Departments deploying Claude Desktop as MSIx
If your IT deparment is deploying Claude Desktop as MSIx, there are some important information in this article.
There are registry keys that needs to be enabled to allow this kind of connection, such as isLocalDevMcpEnabled or isDesktopExtensionEnabled. Please find below a sample powershell code:
powershell.exe -ExecutionPolicy Bypass -Command "& `$msix='C:\pathTo\Claude.msix'; Add-AppxProvisionedPackage -Online -PackagePath `$msix -SkipLicense -Regions 'all'; `$rp='HKLM:\SOFTWARE\Policies\Claude'; New-Item -Path `$rp -Force | Out-Null; Set-ItemProperty -Path `$rp -Name 'isDesktopExtensionEnabled' -Value 1 -Type DWord -Force; Set-ItemProperty -Path `$rp -Name 'isLocalDevMcpEnabled' -Value 1 -Type DWord -Force; `$cd = `$env:APPDATA + '\Claude'; New-Item -ItemType Directory -Path `$cd -Force | Out-Null; @{mcpServers=@{Revit=@{type='stdio';command='C:\NONICAPRO\OtherFiles\System\Core\net8.0-windows\RevitMCPConnection.exe';args=@();timeout=15000}}} | ConvertTo-Json -Depth 10 | Set-Content (`$cd + '\claude_desktop_config.json') -Force; Write-Host 'Deployment Complete' -ForegroundColor Green;"
Feel free to contact us at hello@nonica.io
Can I use multiple A.I. apps simultaneously?
While technically possible, it's recommended to use one A.I. app at a time with the connector to avoid conflicts and ensure optimal performance.
What are the differences between NonicaTab Pro and Free versions?
NonicaTab Pro provides full access to all 35+ tools and unlimited usage. NonicaTab Free offers limited functionality with restrictions on usage.
Is my Revit model data secure when using the connector?
Yes, the MCP protocol ensures secure communication. Your model data is processed locally and transmitted only to your chosen A.I. desktop application according to their respective privacy policies.
Credit
First Revit MCP by lisiting01 and Jean Marc Couffin.